AN-1382: ADP1055 EEPROM Programming
Introduction
The ADP1055 offers a register map and an EEPROM that are programmed with settings for a specific application. This application note focuses on the software procedure to program the ADP1055. Depending on the application environment, some steps, such as entering password and writing board settings, are unnecessary and can be skipped.
Scanning for ADP1055
The ADP1055 can be programmed to respond to 64 different device addresses from 0x40 to 0x7F. This is set by the combination of the resistor value on the ADD pin and the value of Bits[5:4] in Register 0xD0.
- Start with Device 0x40 and increment it all the way until 0x7F.
- For each device address, try to read from Register 0xD0.
- If a no acknowledge is received, the ADP1055 does not exist at that device address.
- If an acknowledge is received and Bits[7:6] in Register 0xD0 return data = 1, then the ADP1055 exists at that device address.
- When the device address of the connected ADP1055 is known, use that same address for all communications to the device.
Key Code Unlocking and Data Write Preparation
The device needs to be unlocked and the command masking must be programmed to write mode to allow writing to the commands.
Changing the Key Code Password
When the device is shipped from the Analog Devices, Inc., factory, the default key code password is 0xFFFFFFFF. At the end of the programming, it is highly recommended that the key code be changed to a new key code to protect the IP.
To change the key code password, write four bytes of the old key code to Register 0xD7 (KEY_CODE command) and then write four bytes of the new key code to Register 0xD7.
Additionally, to further protect the IP, the commands are ready for writing when shipped from the factory, allowing the masking of certain or all commands to protect them from accidental writes and intentional reads.
Unlocking the Device
If the key code is not going to be changed, use the default 0xFFFFFFFF to perform a block write of four bytes using the KEY_CODE command to Register 0xD7 to unlock the device. Next, perform a block read of five bytes to Register 0xD7: the first four bytes are the password, the fifth byte is 1. This ensures that the device is unlocked.
If the key code is changed, use the new key code to unlock the device in the same manner as previously described for unlocking the device without changing the key code.
Data Write Preparation
To enable read/write access to all the commands, perform a block write of 32 bytes with Data 0xFF for each byte to COMMAND_ MASK, Register 0xF4 to enable read/write access to all PMBus commands. Perform another block write of 21 bytes with Data 0xFF for each byte to EXTCOMMAND_MASK (Register 0xF5) to enable read/write access to all the manufacture specific commands.
EEPROM Password and Unlocking
When the device is shipped from the Analog Devices factory, the default EEPROM password is 0xFF. Similar to the key code, to protect the IP, it is highly recommended to change the EEPROM password at the end of the programming.
Changing the EEPROM Password
To change the EEPROM password, write the old password to Register 0xD5 then write the new password to Register 0xD5.
Unlocking the EEPROM
If the EEPROM password is not going to be changed, write 0xFF to Register 0xD5 twice to unlock the EEPROM.
If the EEPROM password was changed, use this new password to unlock the EEPROM by writing the new password to Command 0xD5 twice. To check that the EEPROM is unlocked, conduct a word read from Command 0xFE94; if Bit 15 = 1, the EEPROM is unlocked.
Saving Data and Locking EEPROM
To save data to the EEPROM and to lock the EEPROM, take the following steps:
- Execute a send command to Command 0x15, to upload the data in the commands to the EEPROM.
- Wait for 50 ms for the upload to complete.
- To lock the EEPROM, write any other data, except for the password, to Command 0xD5.
Writing Data to the Device
- Prior to writing data to the device, read the command settings from the “.55s” file that is generated using the ADP1055 graphical user interface (GUI).
- Using I2 C, perform byte writes to the following commands of the device: 0x01 to 0x02
0x10
0x20
0x41
0x45
0x47
0x49
0x4C
0x50
0x56
0x5A
0x5C
0x63
0x69
0xD0
0xFE01 to 0xFE0C
0xFE1D to 0xFE2F
0xFE34 to 0xFE43
0xFE48 to 0xFE57
0xFE5A to 0xFE67 - Next, perform word writes to the following commands of the device, via I2 C: 0x21 to 0x24
0x27 to 0x2A
0x33
0x35 to 0x40
0x42 to 0x44
0x46
0x48
0x4A to 0x4B
0x4F
0x51
0x55
0x59
0x5B
0x5E to 0x62
0x64 to 0x66
0x68
0xFE0D to 0xFE1C
0xFE30 to 0xFE33
0xFE44 to 0xFE47
0xFE58 to 0xFE59
The SMBALERT mask command is written uniquely, as follows:
- Execute eight word writes to Command 0x1B.
- Split the data in the .55s file for Register 0x1B into eight words and each word must be written to 0x1B (refer to the PMBus specification for additional details).
- Perform a block write of 32 bytes with data from the .55s file to Command 0xF4.
- Perform a block write of 21 bytes with data from the .55s file to Command 0xF5.
PEC Control
If the programmer has the capability to recognize acknowledges and no acknowledges in the I2C communication, use the PEC byte for all the writes to ensure proper data transfer.
The PMBus controller implements packet error checking to improve reliability and communication robustness. Packet error checking is implemented by appending a PEC byte at the end of the message transfer. The PEC byte is calculated using a CRC-8 algorithm on all ADDR, command, and data bytes from the start to stop bit, excluding acknowledge (ACK), no acknowledge (NACK), start, restart, and stop bits.
The PEC byte is appended to the end of the message by the device that supplied the last data byte. The receiver of the PEC byte is responsible for calculating its internal packet error code and comparing it to the received PEC byte.
The PMB slave device can communicate with master PMBus devices that support PEC as well as those that do not support PEC. If a PEC byte is available, the PMB checks the PEC byte and acknowledges if it is correct. If the PEC byte comparison fails, the PMB device does not acknowledge the PEC byte and does not process the command sent from the master.
The PMB uses built-in hardware to calculate the PEC code using the CRC-8 polynomial
C(x) = x8 + x2 + x1 + 1
The PEC code is calculated one byte at a time, in the order that it is received. In a read transaction, the PMB appends the PEC byte following the last data byte. In a write transaction, the PMB compares the received PEC byte to the internally calculated PEC code.
Board Settings
The board settings in the .55s file are used for the proper functioning of the ADP1055 GUI. Additionally, during the evaluation process, these settings are stored in Page 5 of the EEPROM. In production for standalone mode operation, the device does not need these board settings to be saved to the device.
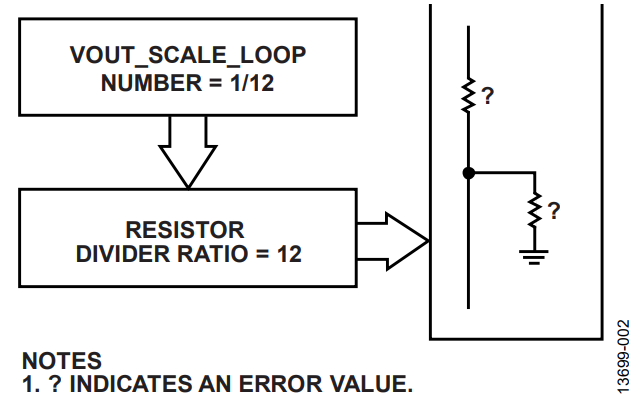
To calculate the command value from the resistor value in the board settings, follow the example procedure shown in Figure 1.


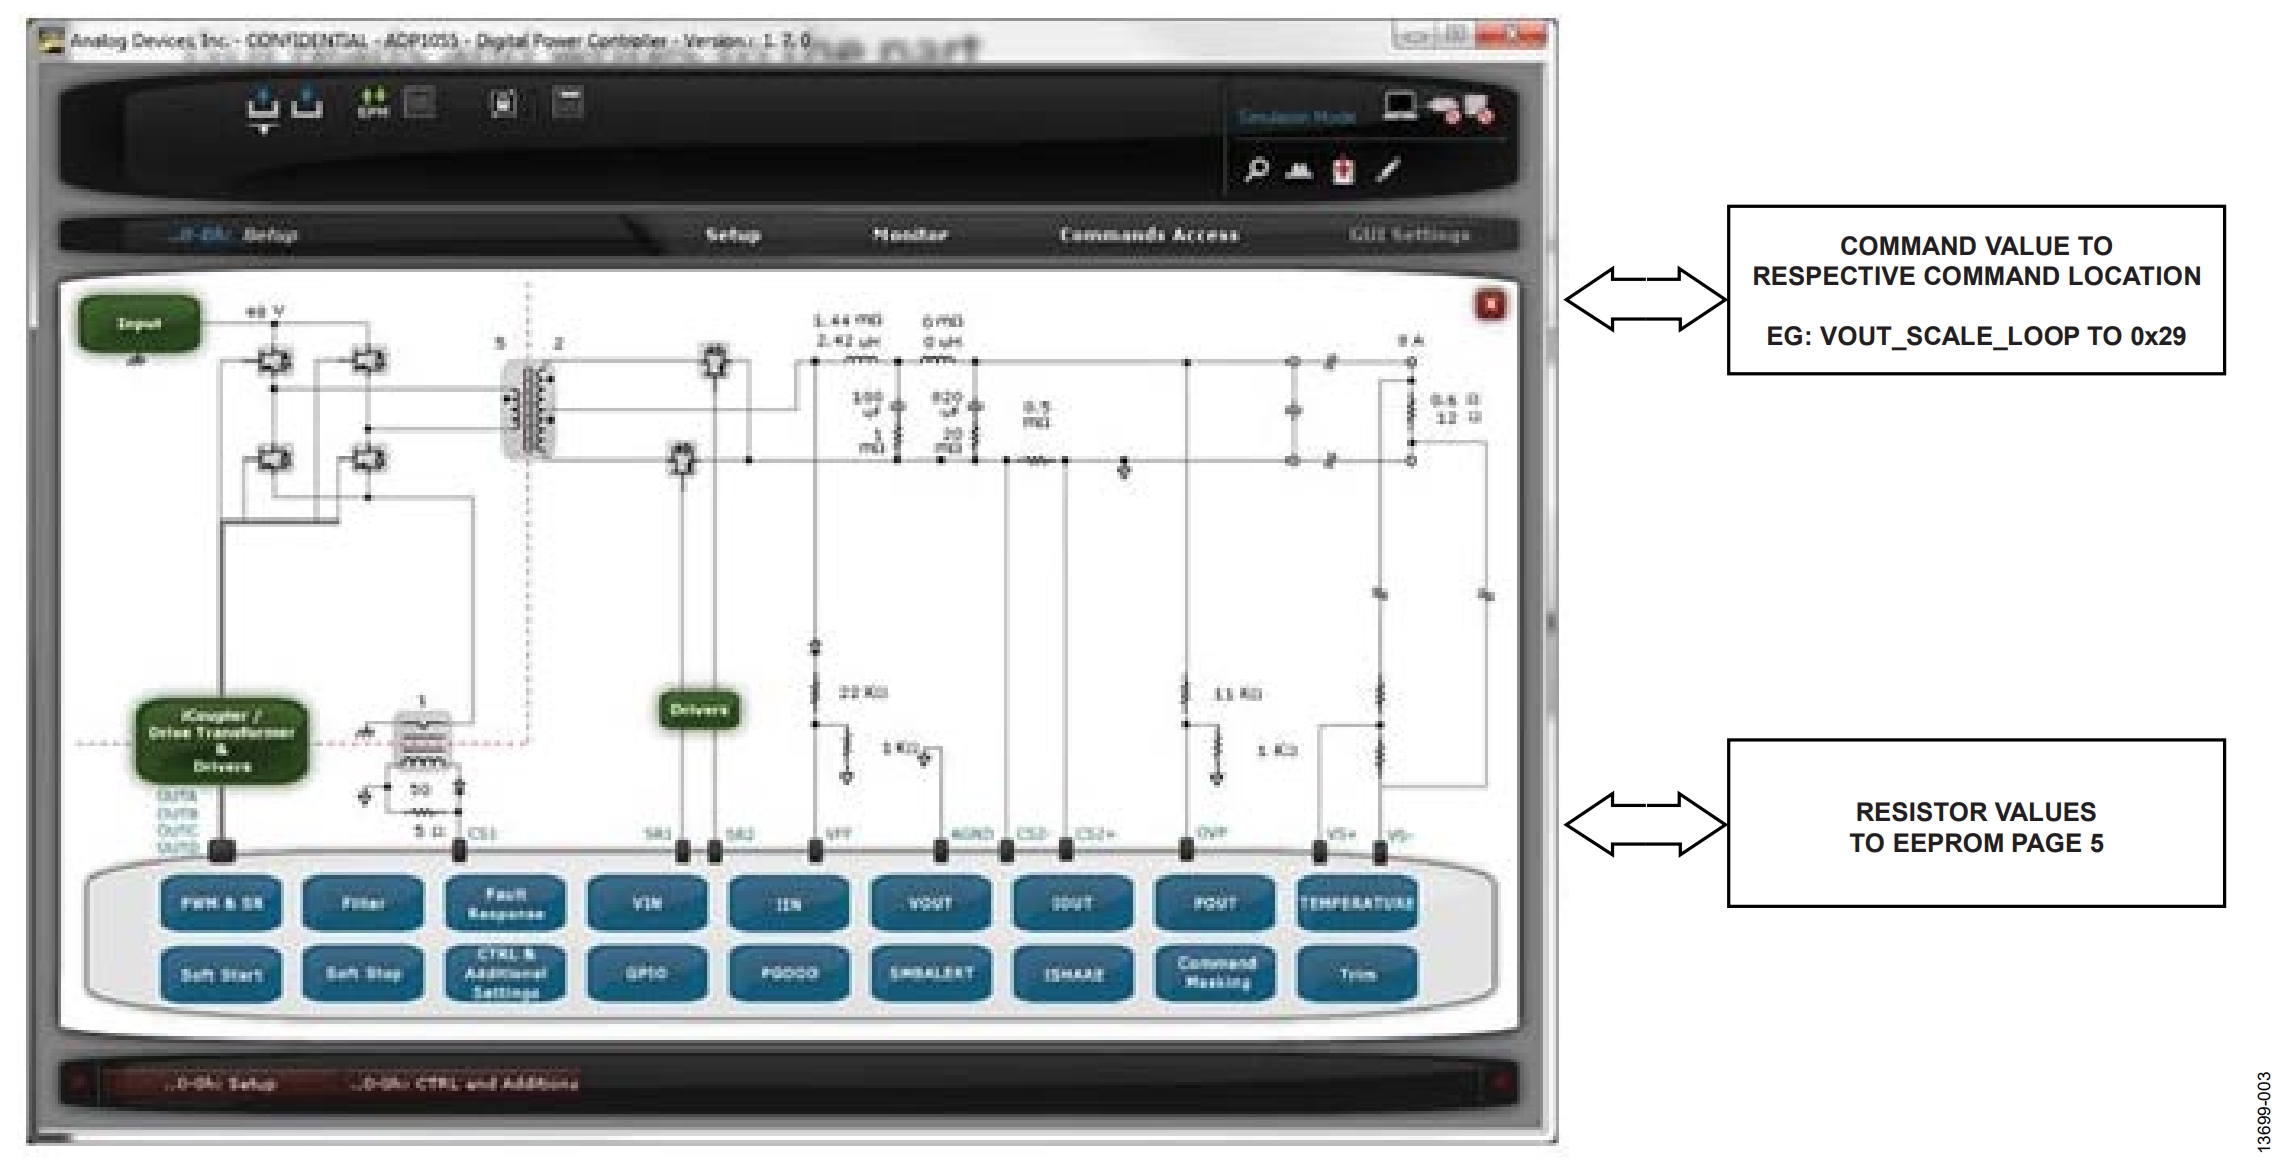
Due to the flexibility of PMBus, several different combinations can result in the same final value of a particular component. For example, when calculating the resistor value for board settings from the command value, if too many combinations are used, they may give the same number, as shown in Figure 2.

If such a case exists during production, as shown in Figure 2, then immediately upon connecting the device, the GUI notices that the board settings are missing from Page 5 of the EEPROM. A prompt is then sent to load the corresponding board settings from a .55s file (see Figure 3).

著者

